Welcome to Go2Run
Describe an app. Run it. Publish. That's the whole loop — Go2Run handles everything in between.
❇ Skip the explanation? Go straight to Build your first app — about five minutes to your first live URL.
How it works:
Three steps, each one click apart:
Describe.
Type what you want into the chat box. Plain English or Chinese, no syntax. The more specific the prompt, the closer the result.
Run.
Click 「RUN IT NOW」. Behind the scenes Go2Run plans the structure, writes the code, installs dependencies, and sets up storage if your app needs to remember things — then runs the app live in the preview area.
Publish.
Click 「PUBLISH」. Your app gets a 「your-app-xxxx.go2run.space」 URL anyone can open — hosting, HTTPS, and a clean URL, all automatic. Send it to teammates as a prototype, hand it to early users as an MVP, deliver it to a client, or open it to the public as a real product.
Want to keep going? Keep talking. Every reply rebuilds the app on the spot — change copy, swap colors, add features, restructure the data.
What people build:
A few situations Go2Run handles well:
- ☑️Personal projects — a daily mood tracker, a side-project landing page, a portfolio with a working contact form.
- ☑️Team tools — onboarding portals, status dashboards, simple CRMs, internal admin UIs.
- ☑️Pitch demos — a "what this product would feel like" prototype to show customers or investors before committing to a real build.
- ☑️Classroom & teaching — instructors handing students working examples; students shipping their first deployed app.
- ☑️Real launches — actual products and MVPs deployed to a custom domain and shared with end users.
Not sure where to start? Build your first app has a ready-to-paste prompt.
What you build on:
Go2Run generates full-stack web apps on a modern TypeScript stack — typically React + Vite + Tailwind + Prisma, with Bun as the runtime. The AI writes the code, you describe the intent.
It plays well with:
- ☑️Custom domains — once published, point your own domain at the app; HTTPS is auto-provisioned.
- ☑️Built-in database — browse tables and edit rows in the editor; the AI designs the schema.
The code is yours — you can download what Go2Run generates whenever you want.
Next to read
Go2Run isn't just for developers — anyone can ship a working app in minutes.
Build your first app
Turn one sentence into a working app — no code required.
Let's walk through a real example:
❤️ "Build a personal task planner app where people can quickly add daily tasks, set priorities and due dates, drag tasks to reorder them, and mark them as completed. Show simple daily progress tracking and keep everything saved locally in the browser without requiring login."
You can start without an account — Go2Run will prompt you to sign up partway through. Ready? Let's go 👇
Option 1 · Guided walkthrough
Option 2 · Step-by-step walkthrough
The same flow as the Guided walkthrough above, in text and screenshots. First time on Go2Run? Follow these steps and you'll have a working app in a few minutes:
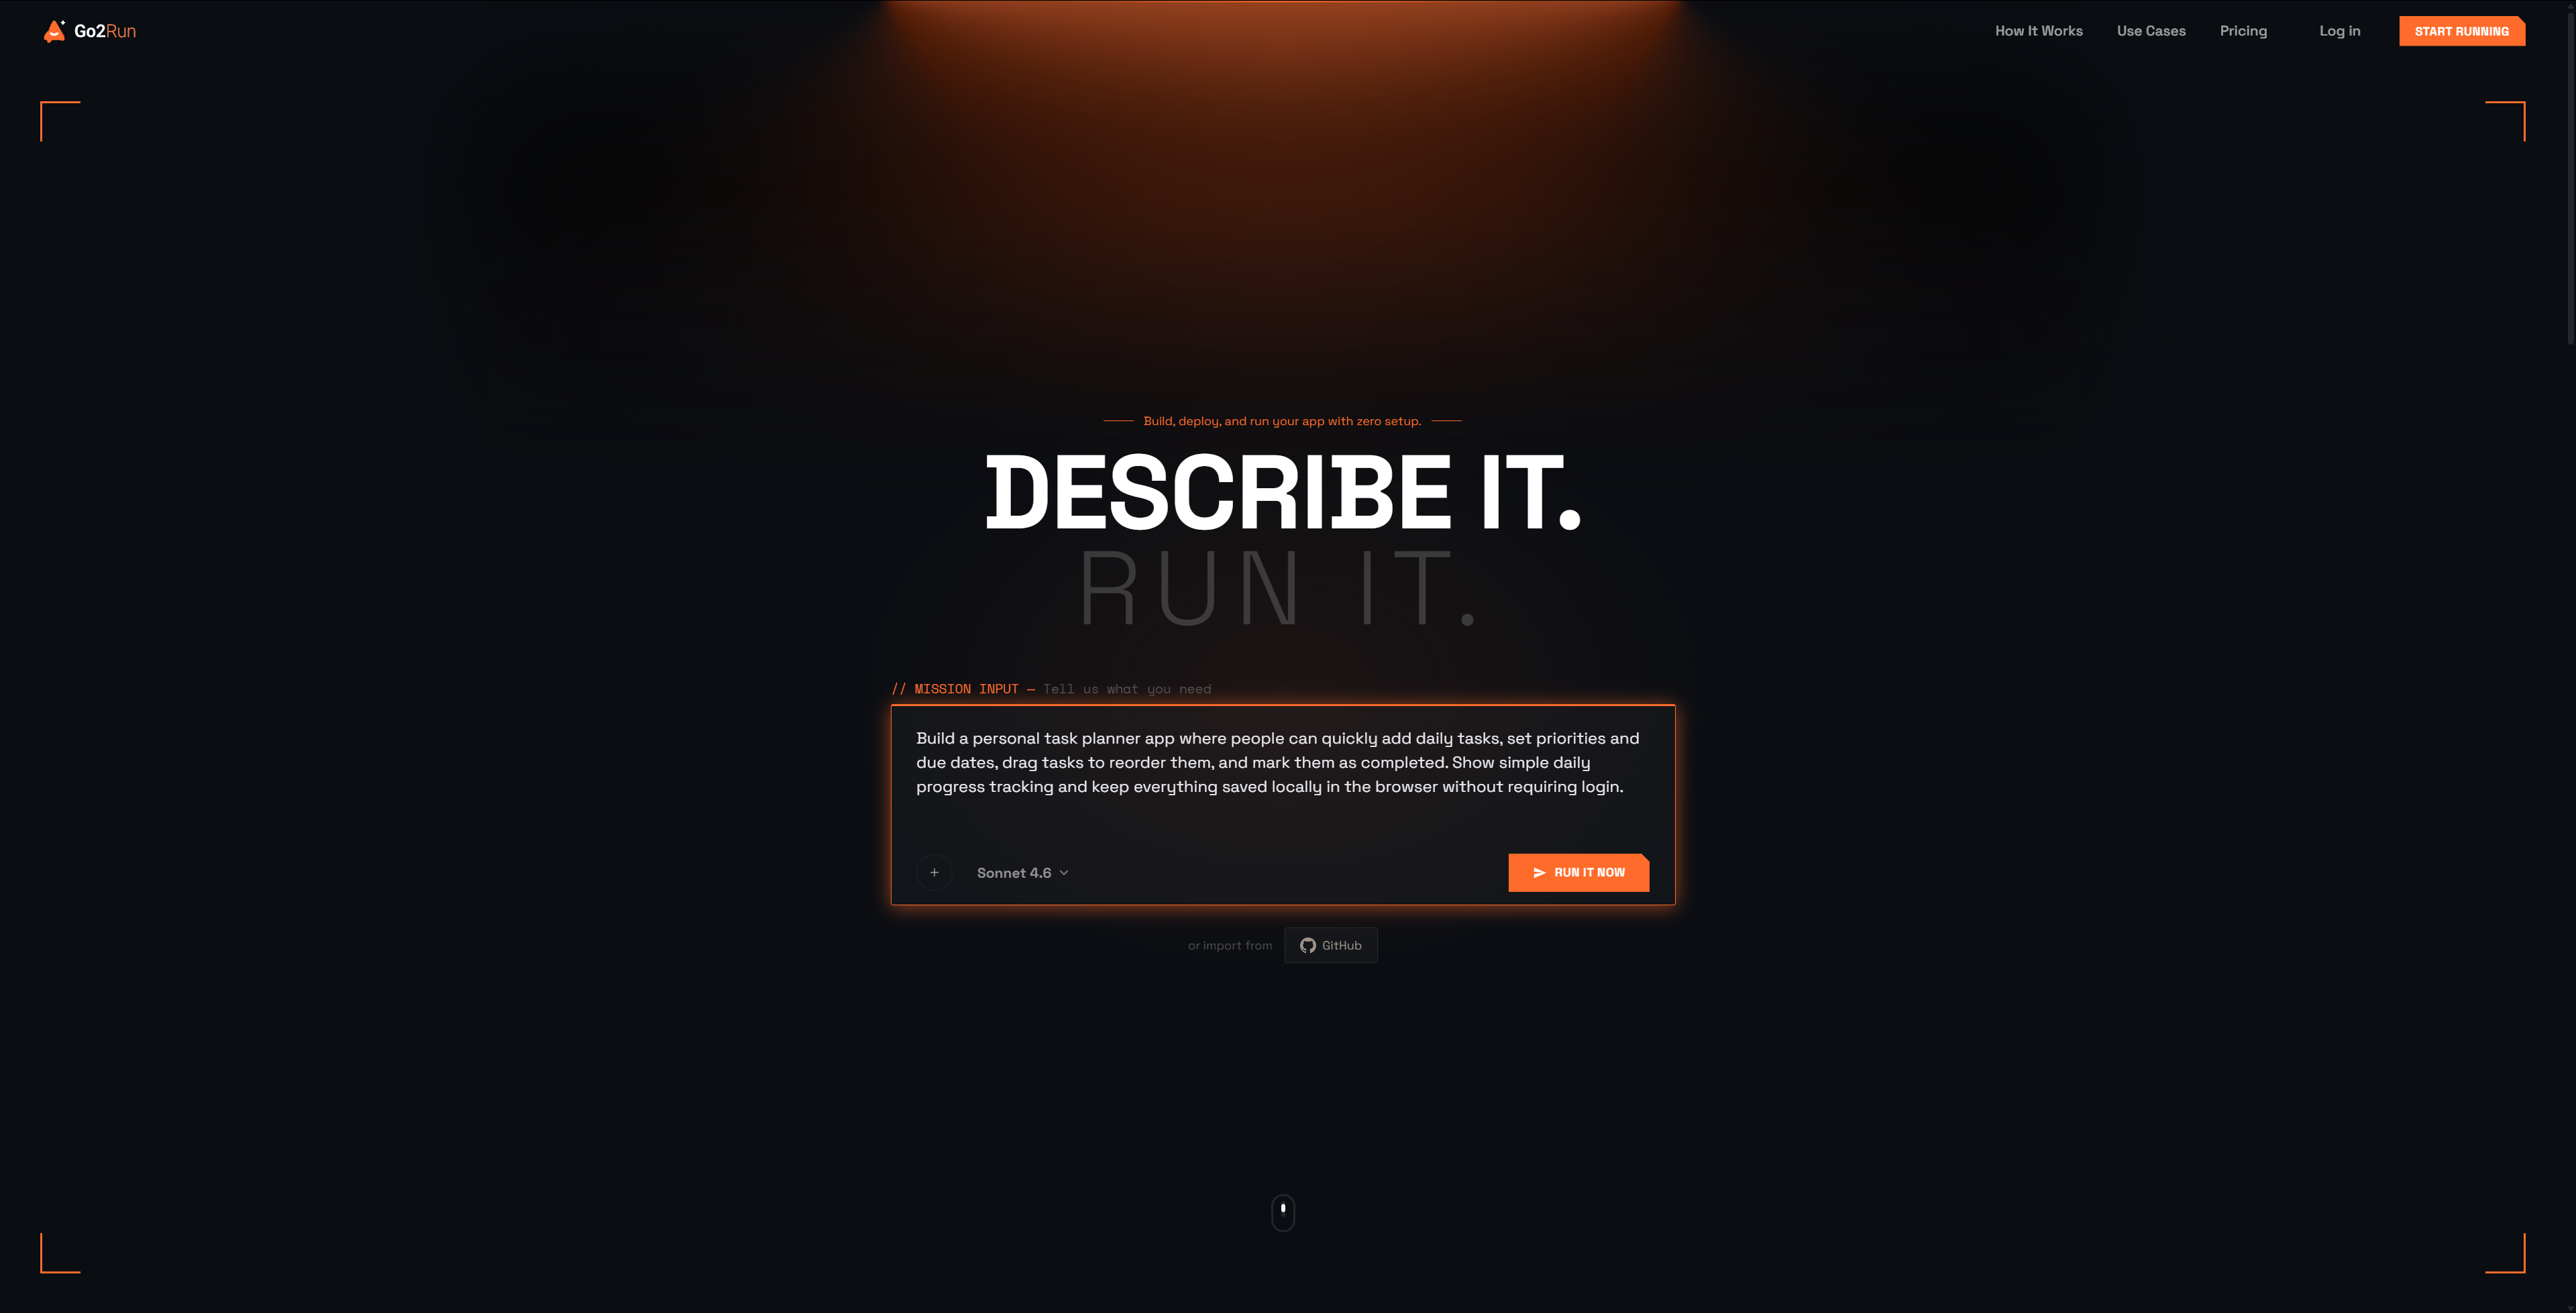
📌 Step 1.
Open go2run.ai in a new tab. The big MISSION INPUT box in the middle of the page is where everything starts.
📌 Step 2.
Paste this prompt into the MISSION INPUT box, then click RUN IT NOW at the bottom right:
Build a personal task planner app where people can quickly add daily tasks, set priorities and due dates, drag tasks to reorder them, and mark them as completed. Show simple daily progress tracking and keep everything saved locally in the browser without requiring login.
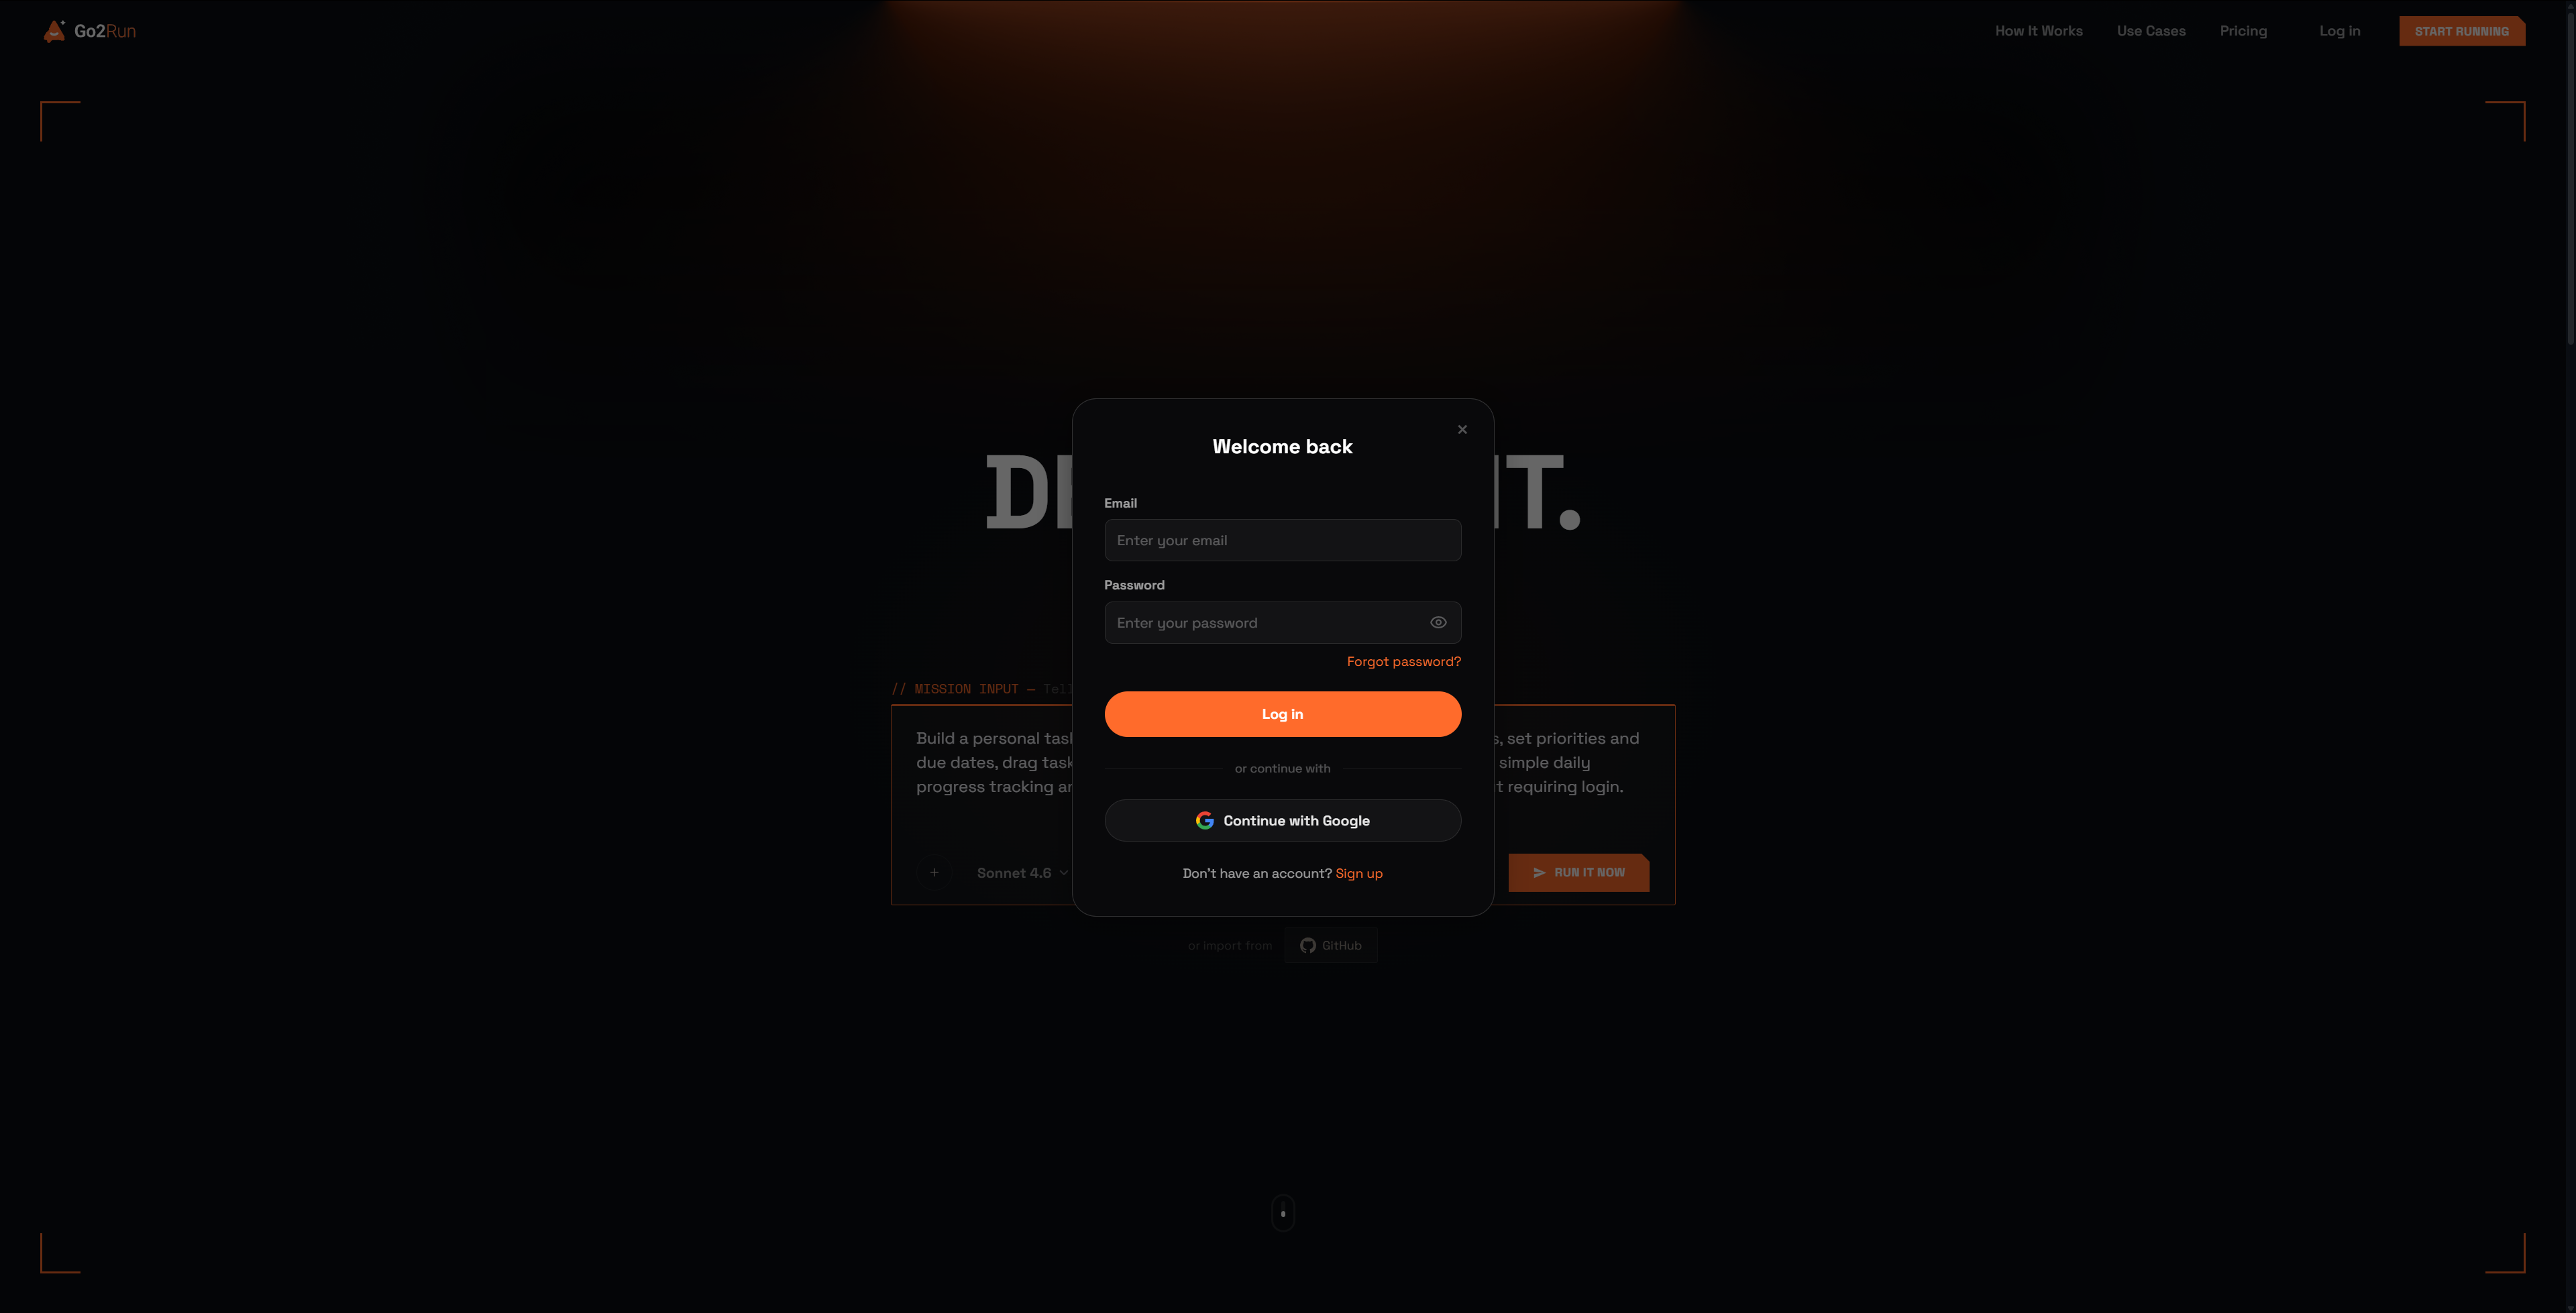
📌 Step 3.
Sign in or sign up (email or Google — no credit card required). You'll skip this step if you're already logged in.
📌 Step 4.
You'll land in the Project Editor. Wait a few minutes while Go2Run plans the structure, writes the code, and installs dependencies — the left panel shows Analyzing while the right panel fills in build progress.
💡 Because this prompt's features don't require login or external services, it usually builds faster.

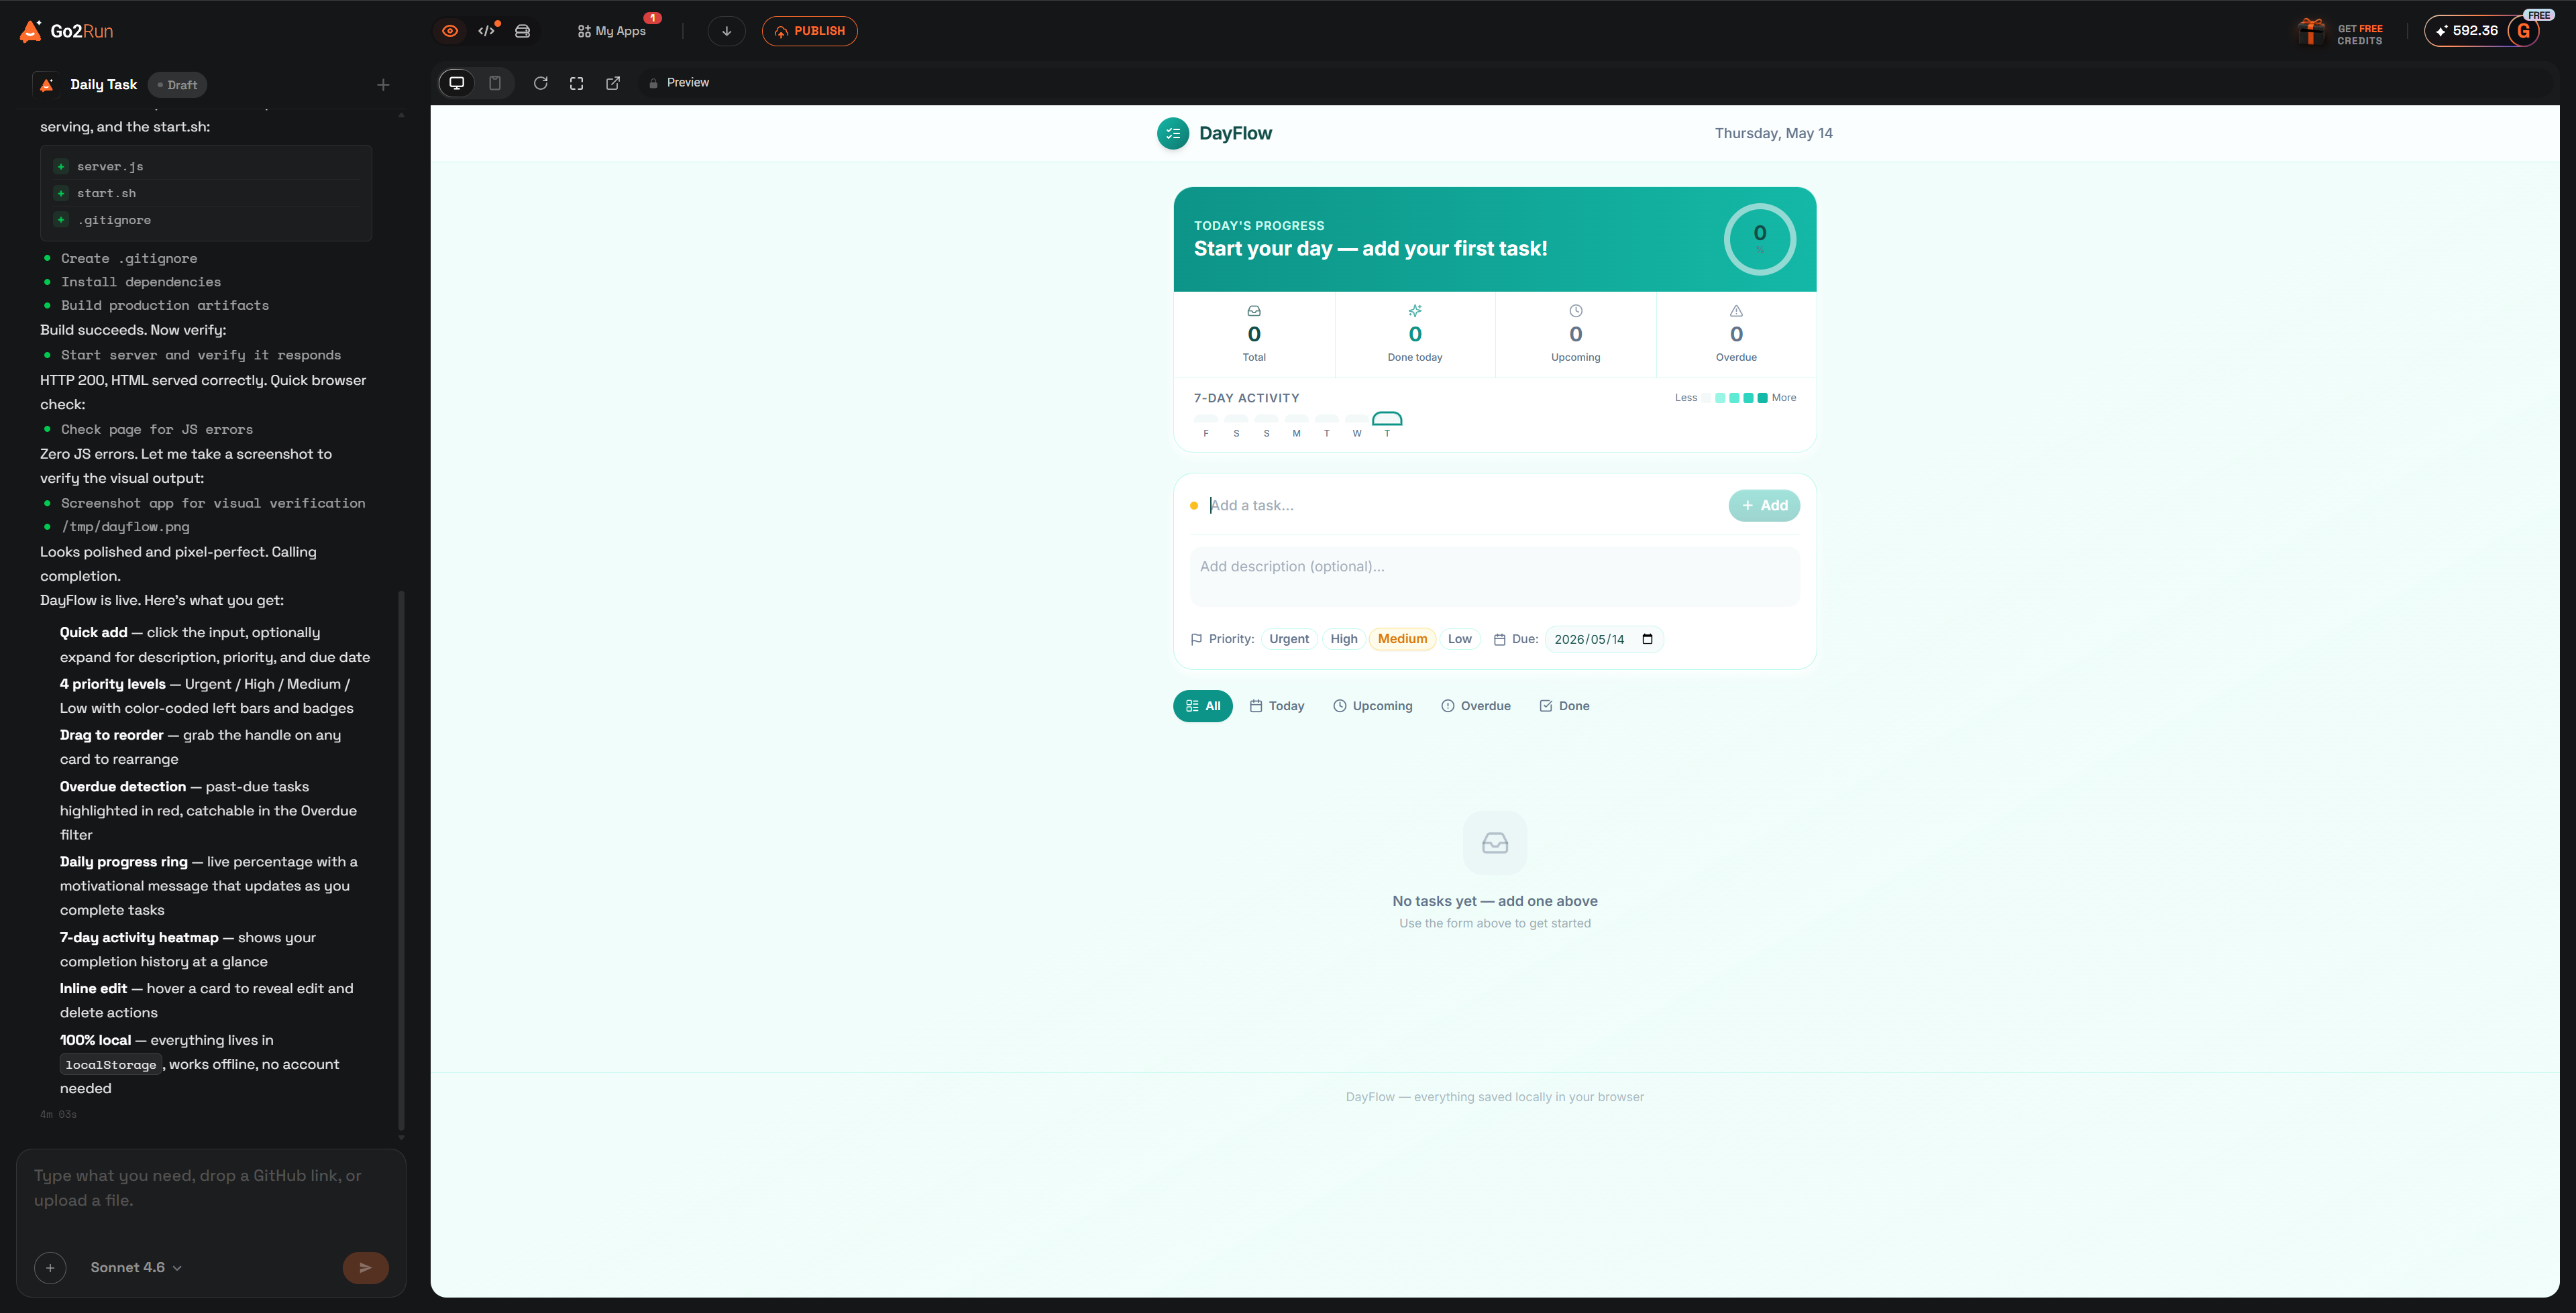
📌 Step 5.
Once your app is running in Preview, try it out — add a few tasks, set priorities and due dates, drag to reorder, check them off. Happy with it? Click the orange PUBLISH button in the top right to deploy. Go2Run packages and ships it, then gives you a default URL like your-app-xxxx.go2run.space.
📌 Step 6.
Once live, go to My Apps in the top bar — copy the endpoint link to share with anyone, or connect a custom domain.
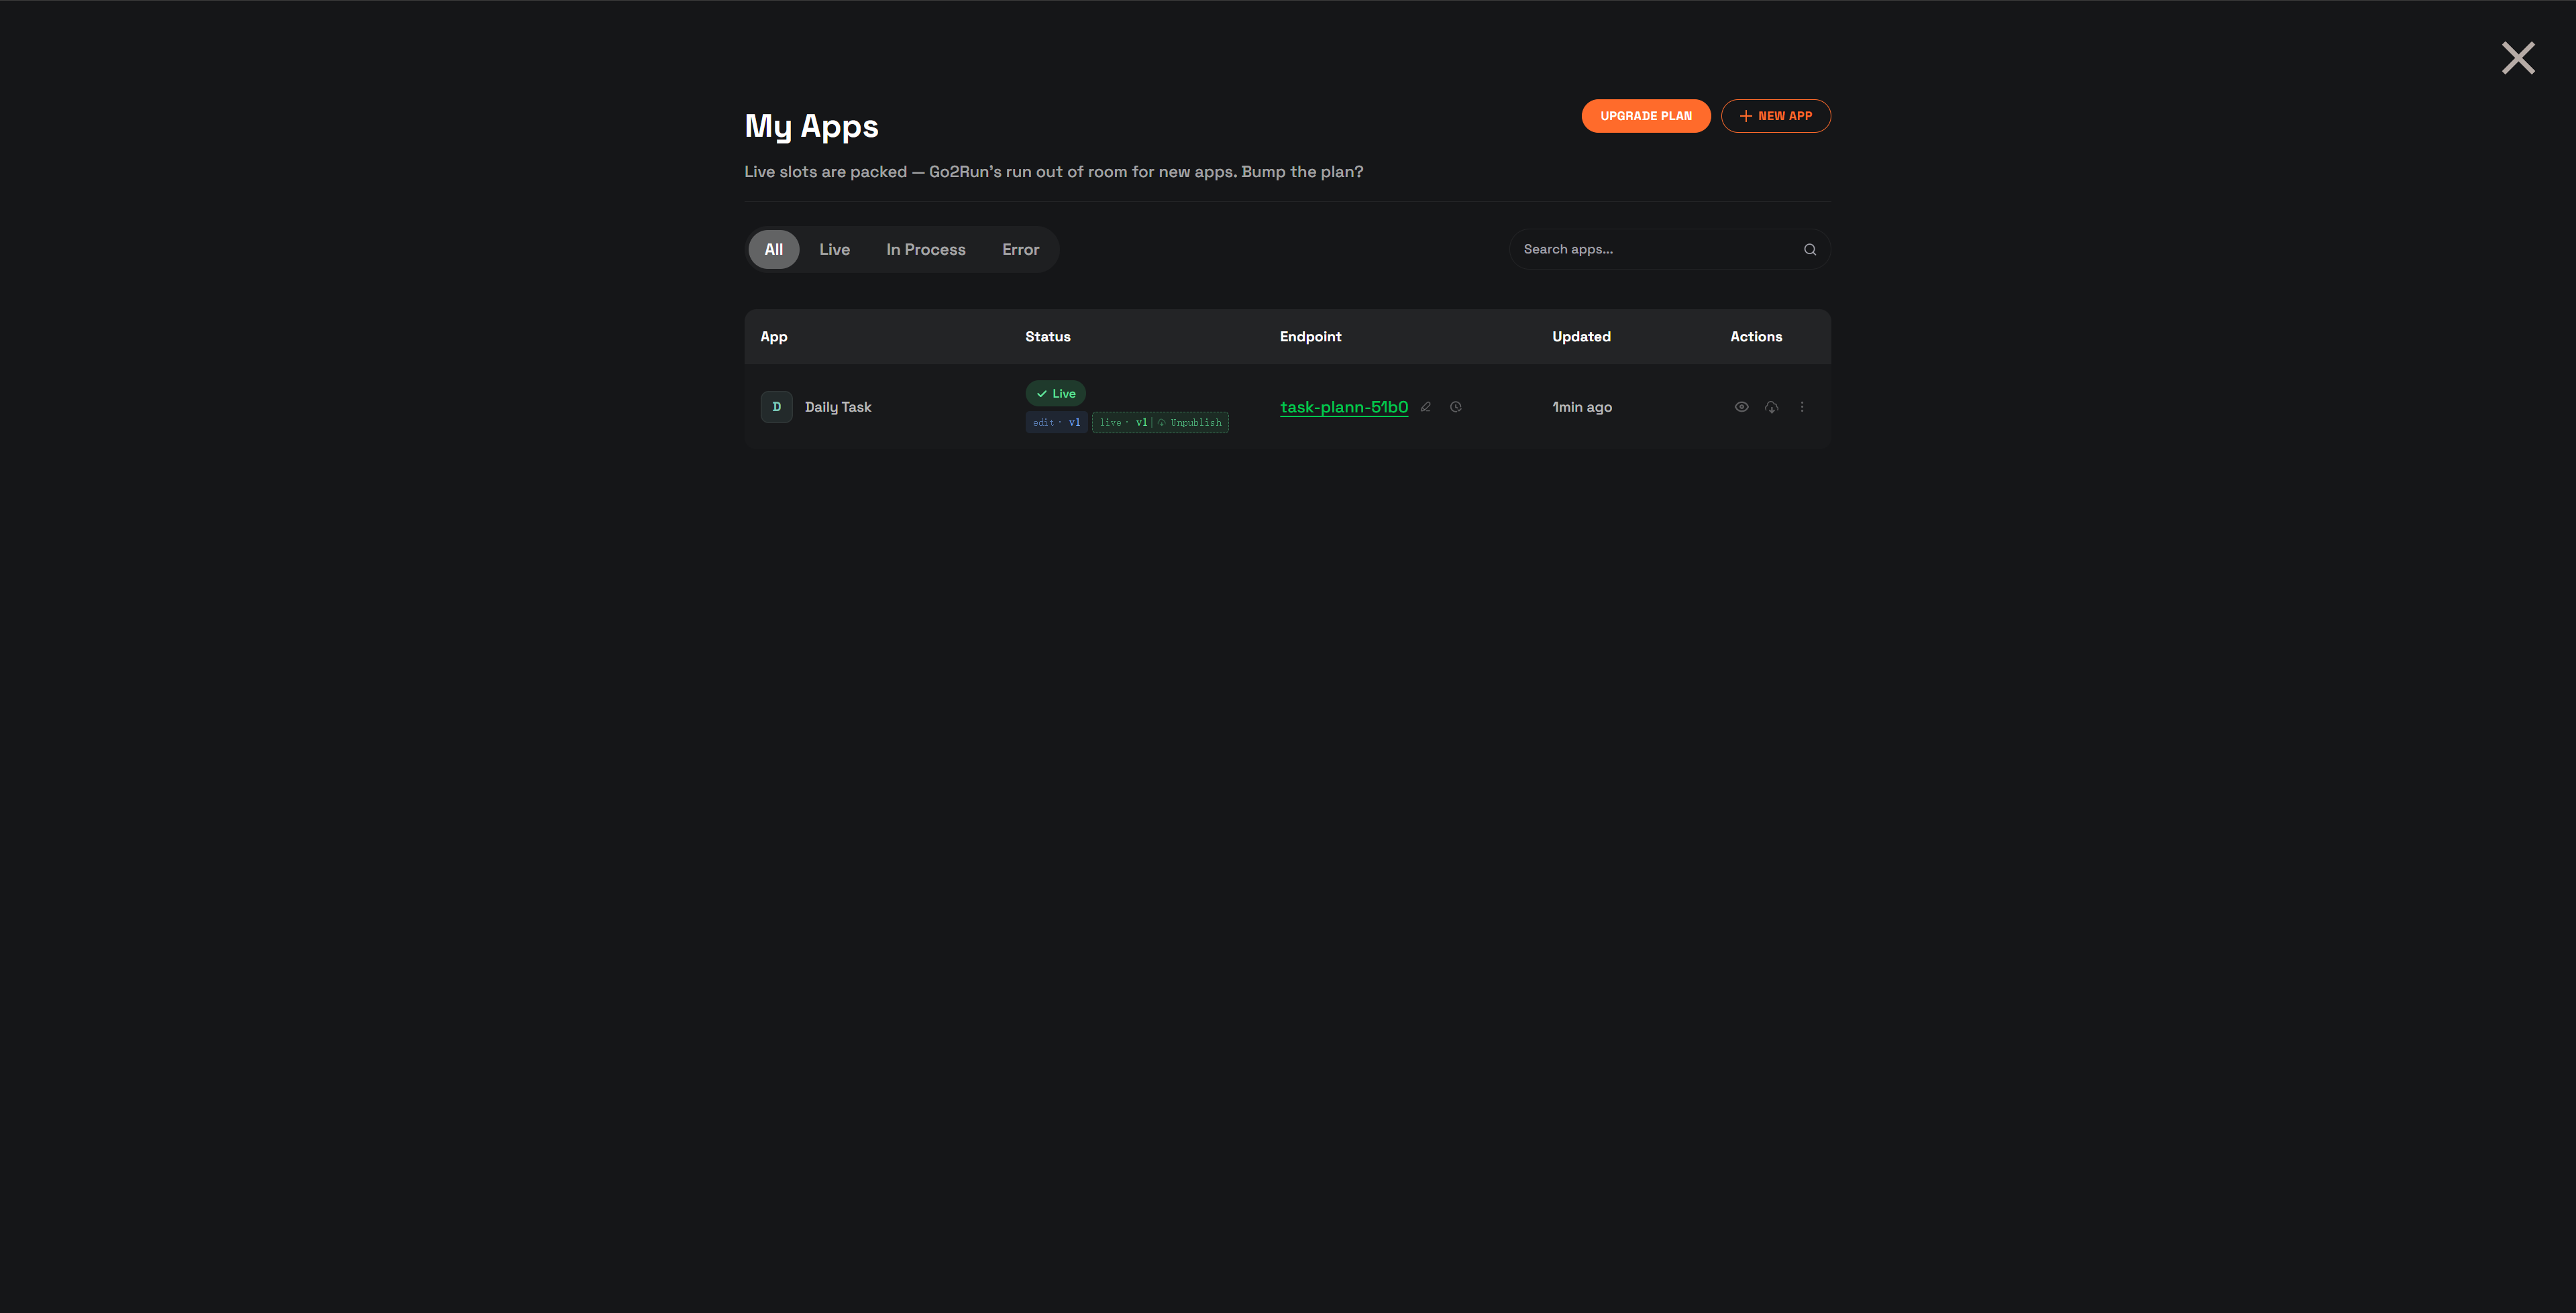
🎖️🎖️🎖️ Done! You just built and deployed your first Go2Run app!
Publish & edit domain
Deploy your app to the public web — and put it on your own domain.
Building vs publishing
Everything you do in the Project Editor — describing, previewing, modifying — happens in your building environment. Only you can access it.
Publishing is what puts your app on the public web, so anyone can open it via URL.
How to publish
Click the PUBLISH button in the top right of the Project Editor. Go2Run packages your app, deploys it to its servers, and assigns a default URL:
https://<your-app-name>-<xxxx>.go2run.space
<xxxx> is a 4-character random suffix appended automatically, so each app gets a unique subdomain.
Updates and re-publishing
After modifying your app, click PUBLISH again — the same URL updates to the latest version. Visitors just refresh to see it.
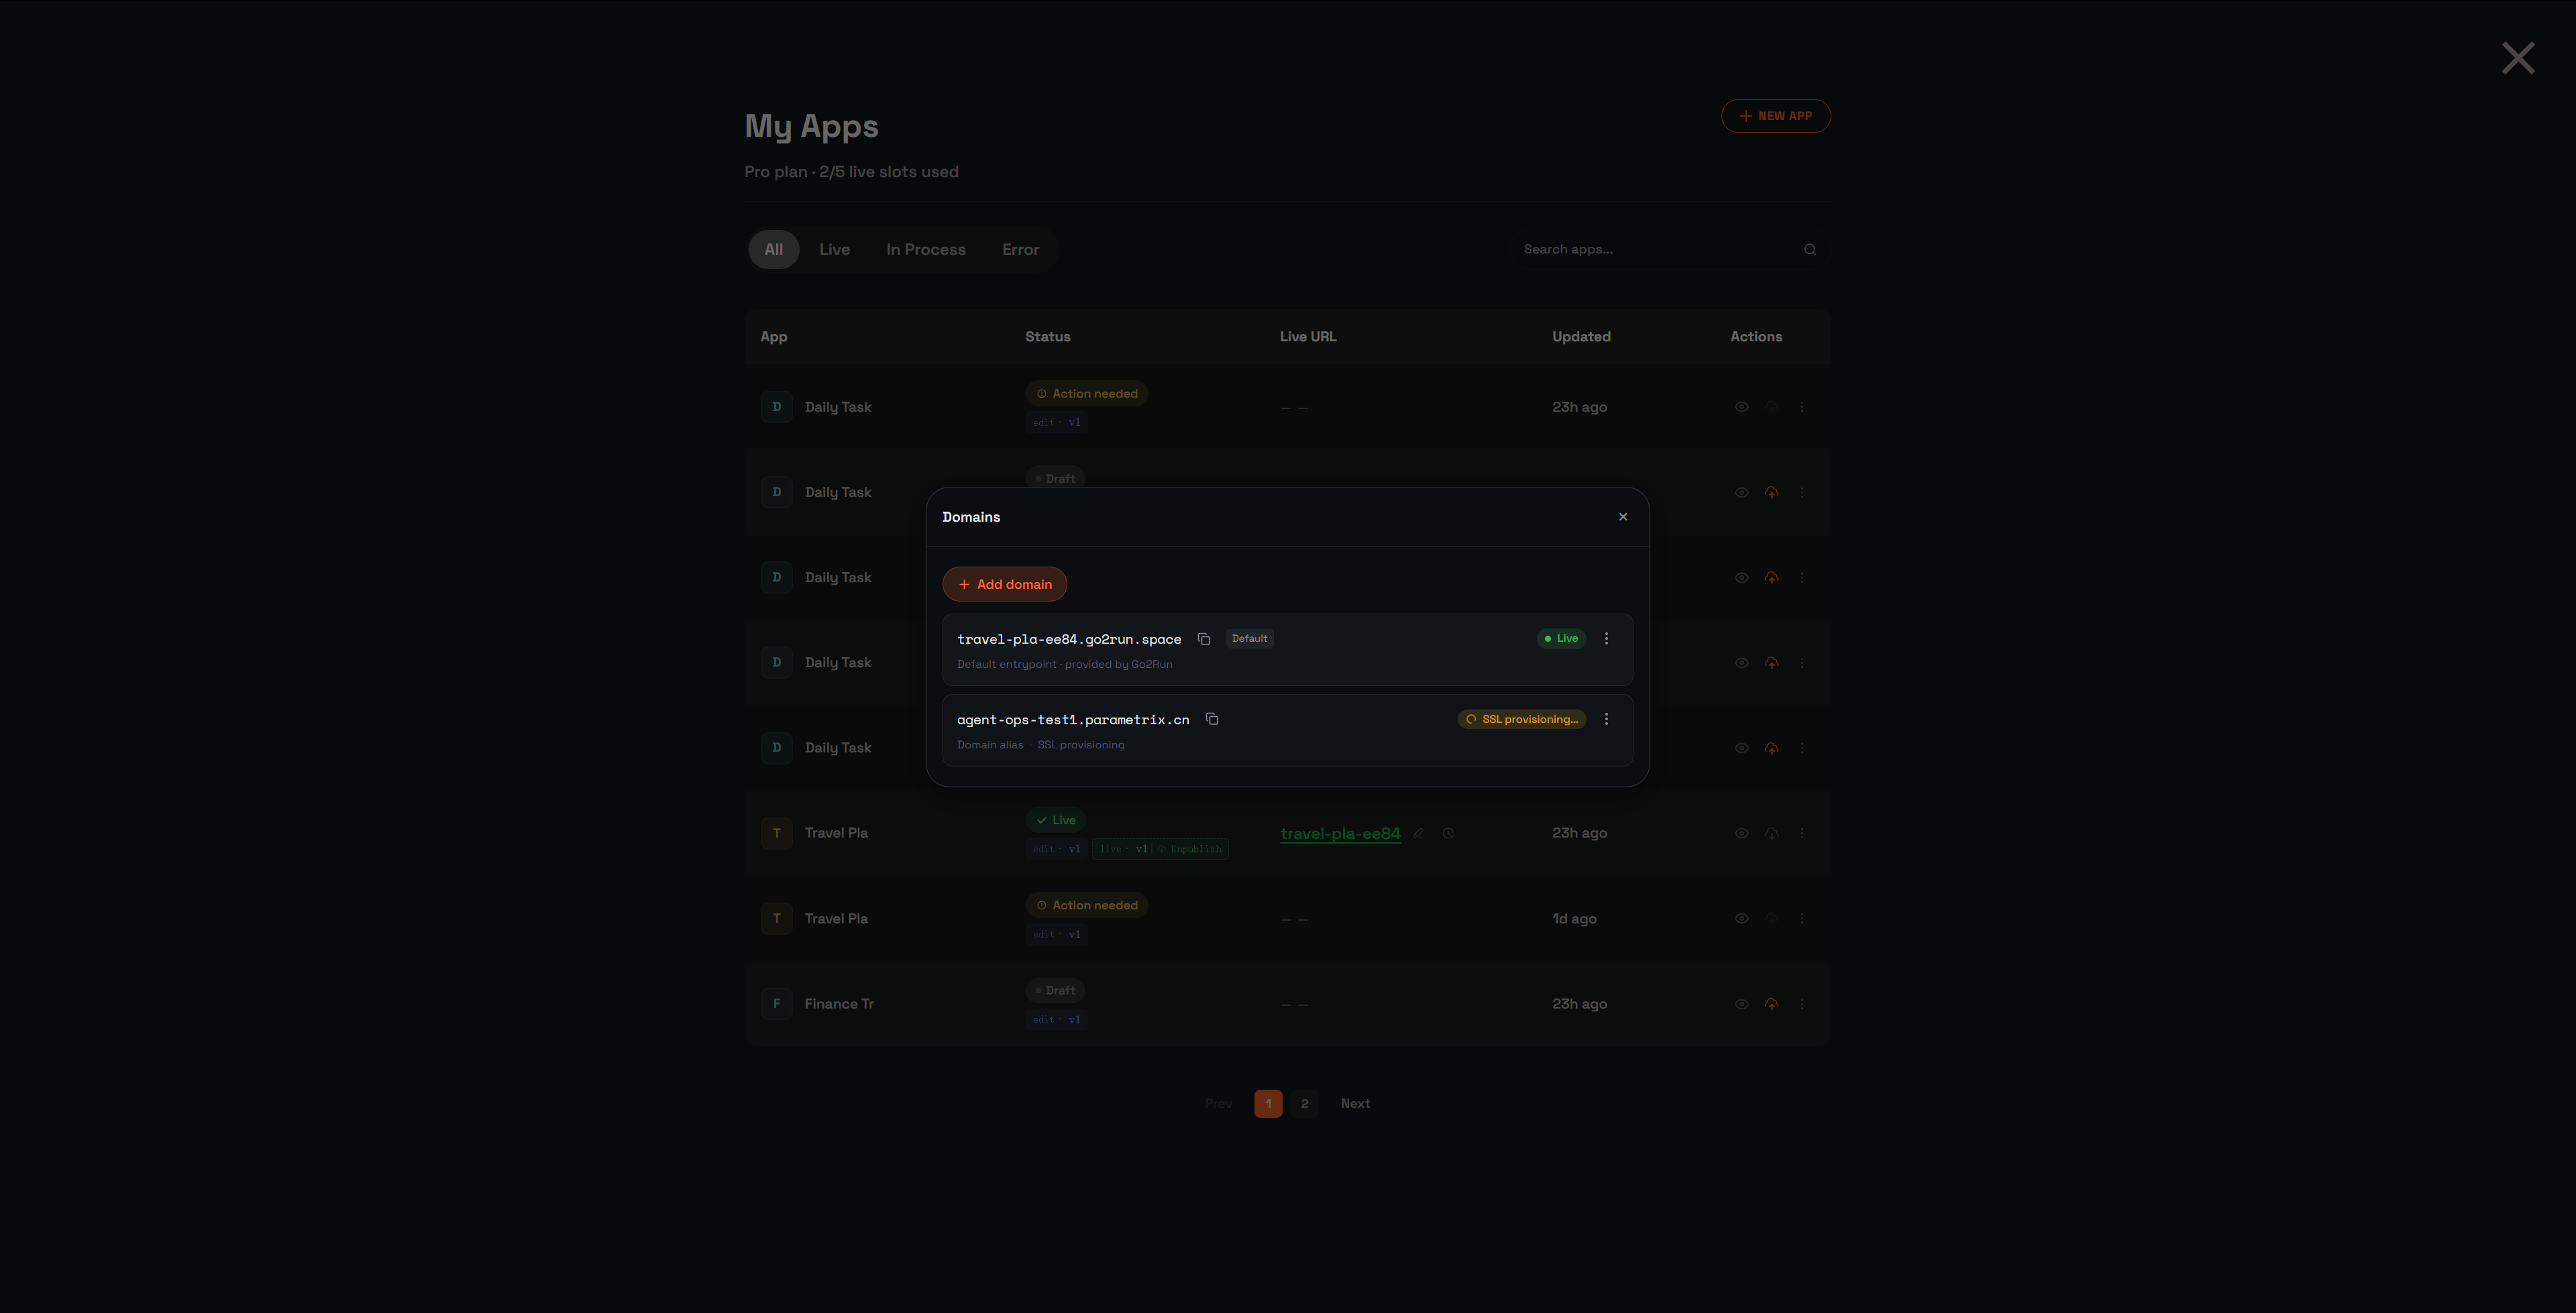
Connect a custom domain
Want your app on app.yourcompany.com instead of the default Go2Run URL? You can connect any domain you own.
Open the Domains dialog
From My Apps, find your app in the list. In the Live URL column, click the pencil (edit) icon next to the URL. The Domains dialog opens, showing your default *.go2run.space URL.
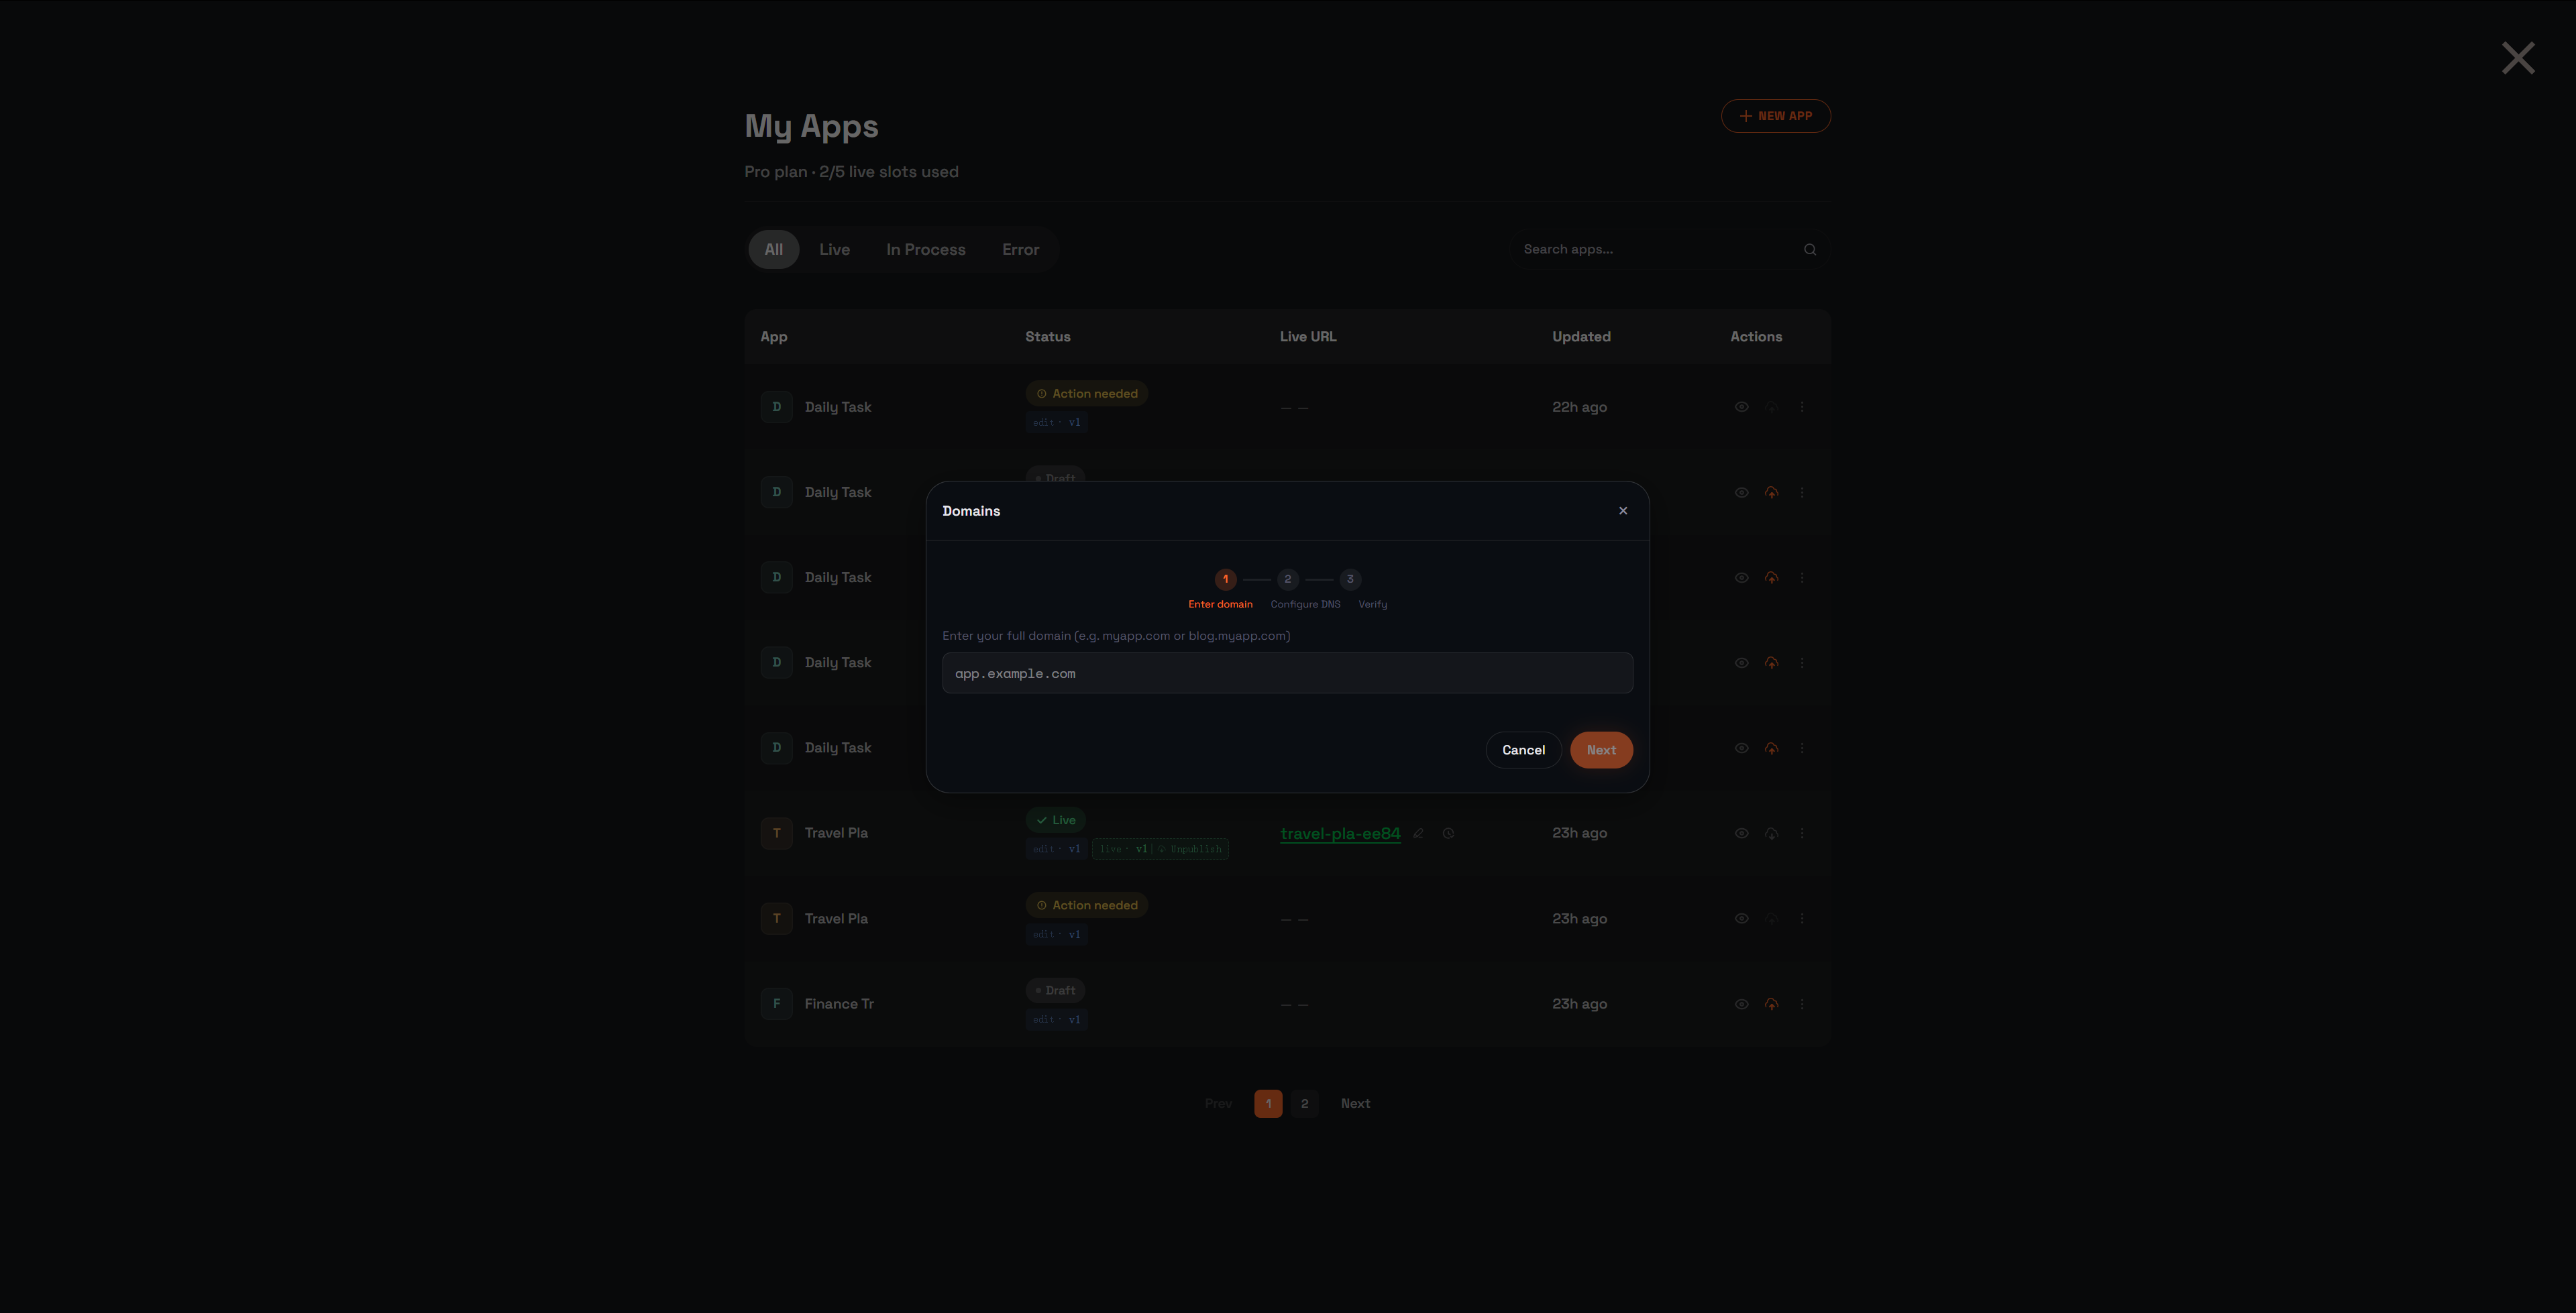
Click + Add domain to start adding a custom one.
1 Enter domain
Type your full domain — either the apex (myapp.com) or a subdomain (blog.myapp.com) — and click Next.
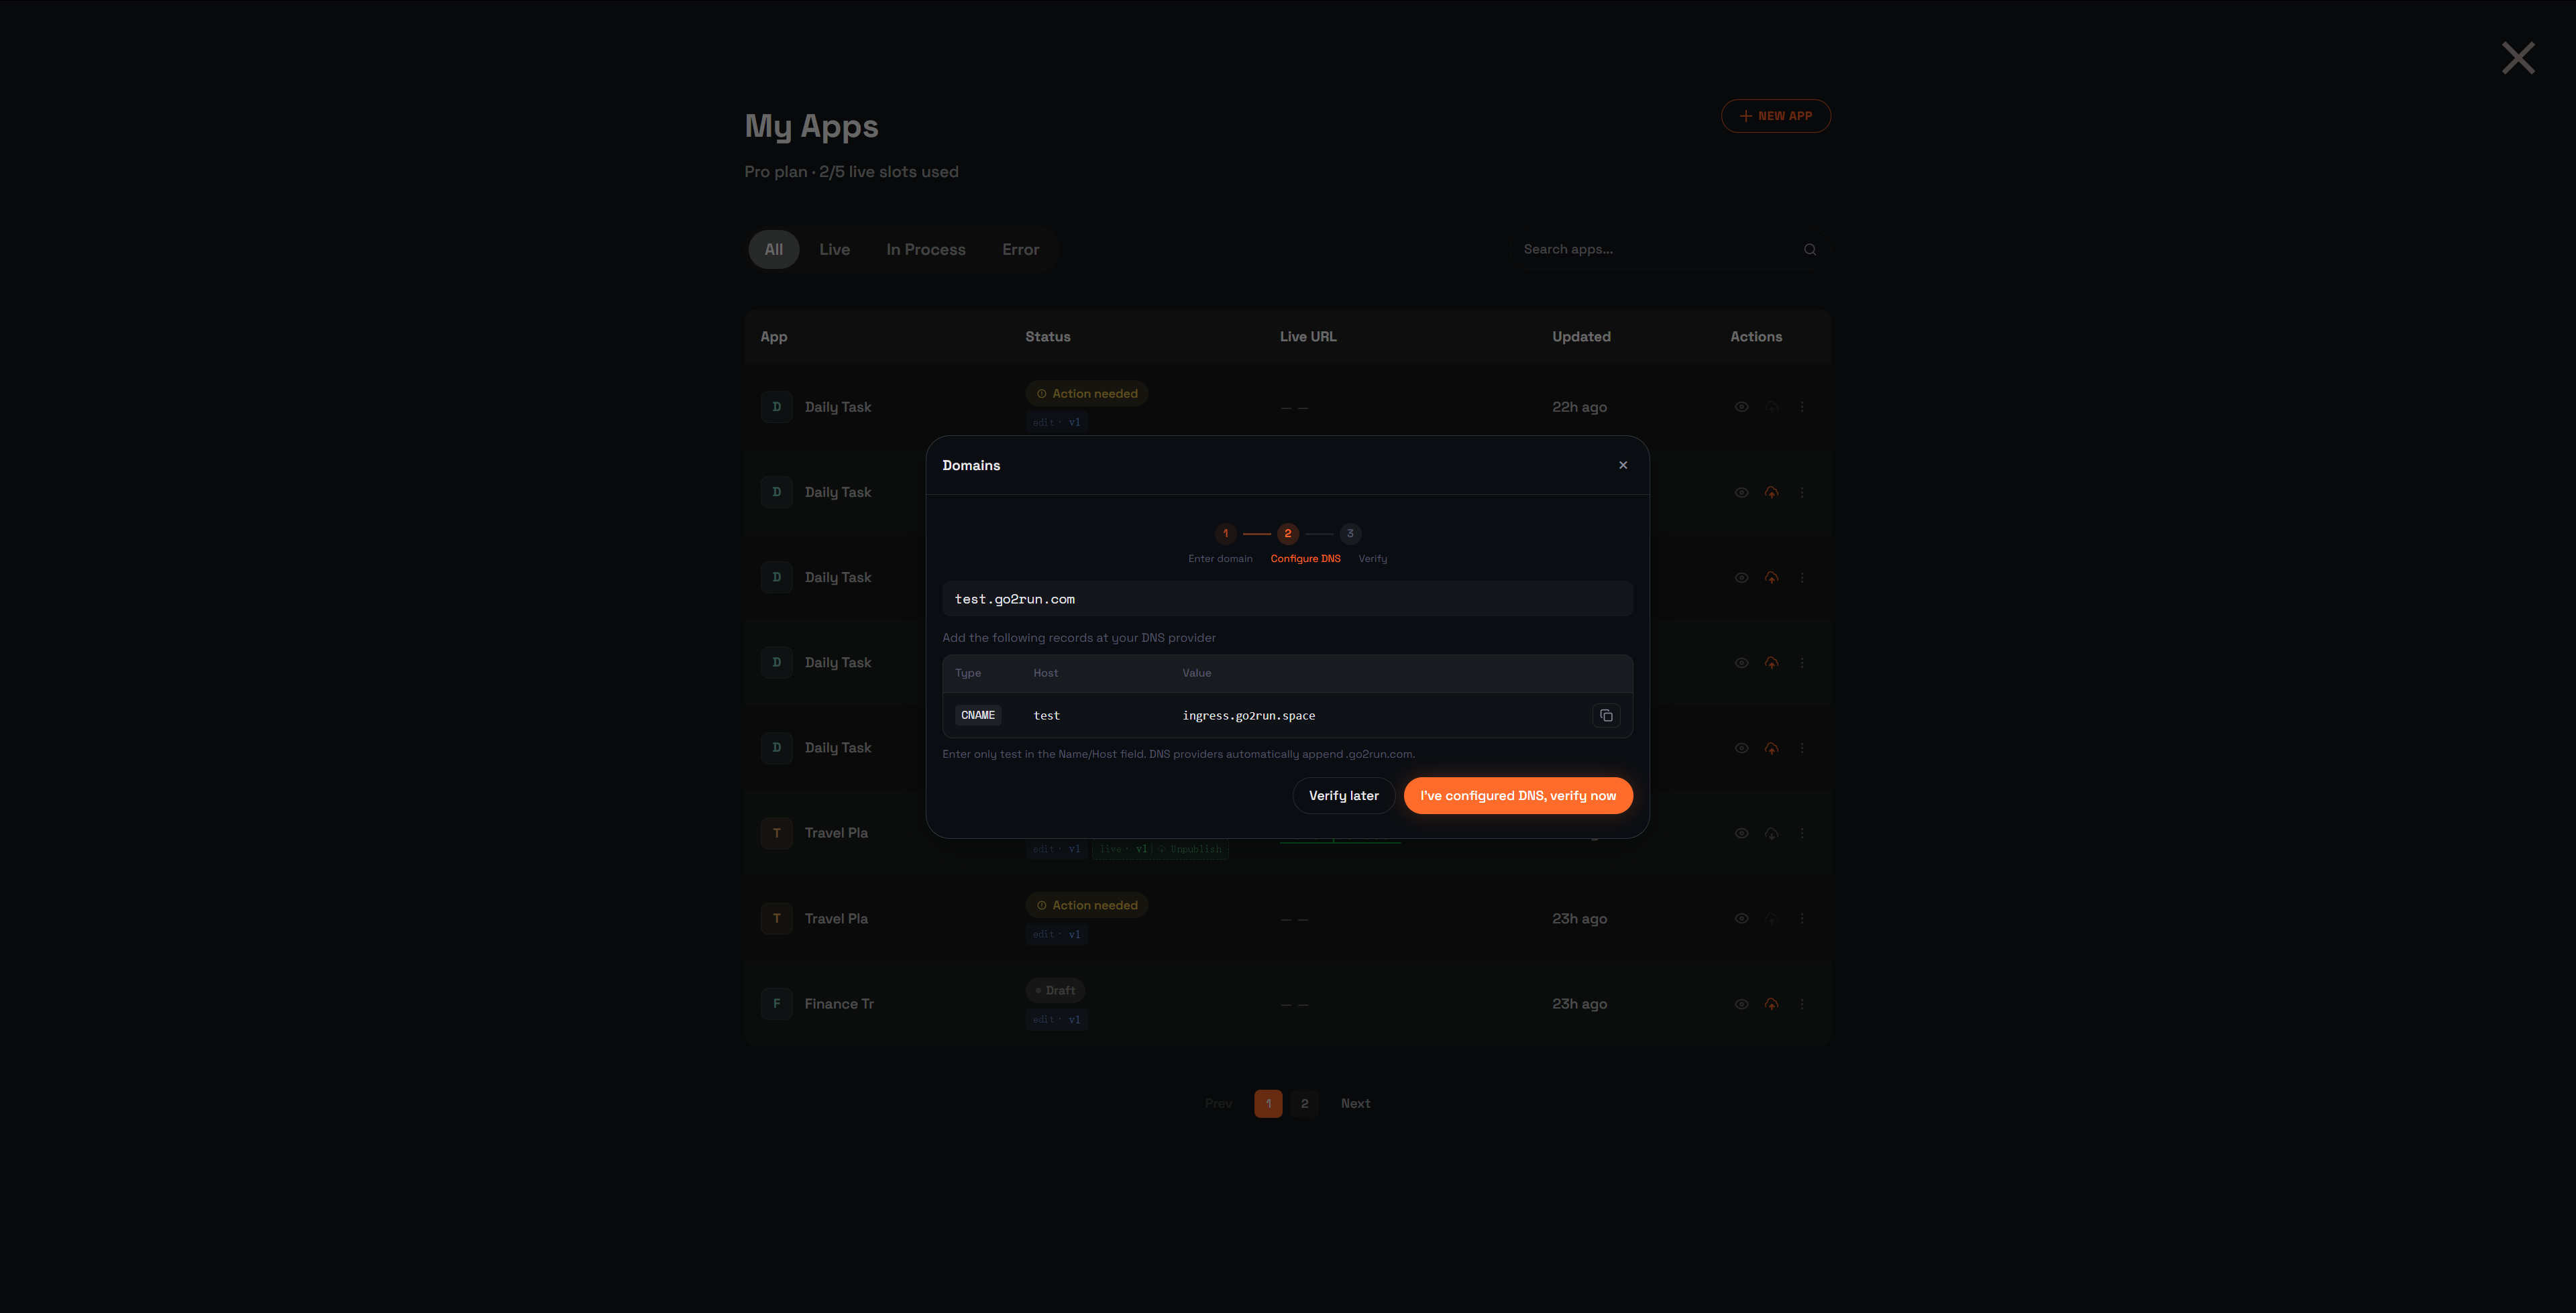
2 Configure DNS
Go2Run shows you the exact DNS record to add (Type / Host / Value). Copy the value, log into your DNS provider (Cloudflare / Namecheap / DNSPod / etc.), and add the record.
💡 The Host field is just the subdomain part (e.g. test, not test.go2run.com). DNS providers auto-append the base domain.
Once the record is saved at your DNS provider, click I've configured DNS, verify now. If you need more time, click Verify later and come back.
3 Verify
Go2Run checks DNS propagation (usually a few minutes). Your new domain appears in the Domains list with SSL provisioning… while HTTPS is being set up via Let's Encrypt — no certificate upload needed. Once SSL is ready, the status flips to Live.
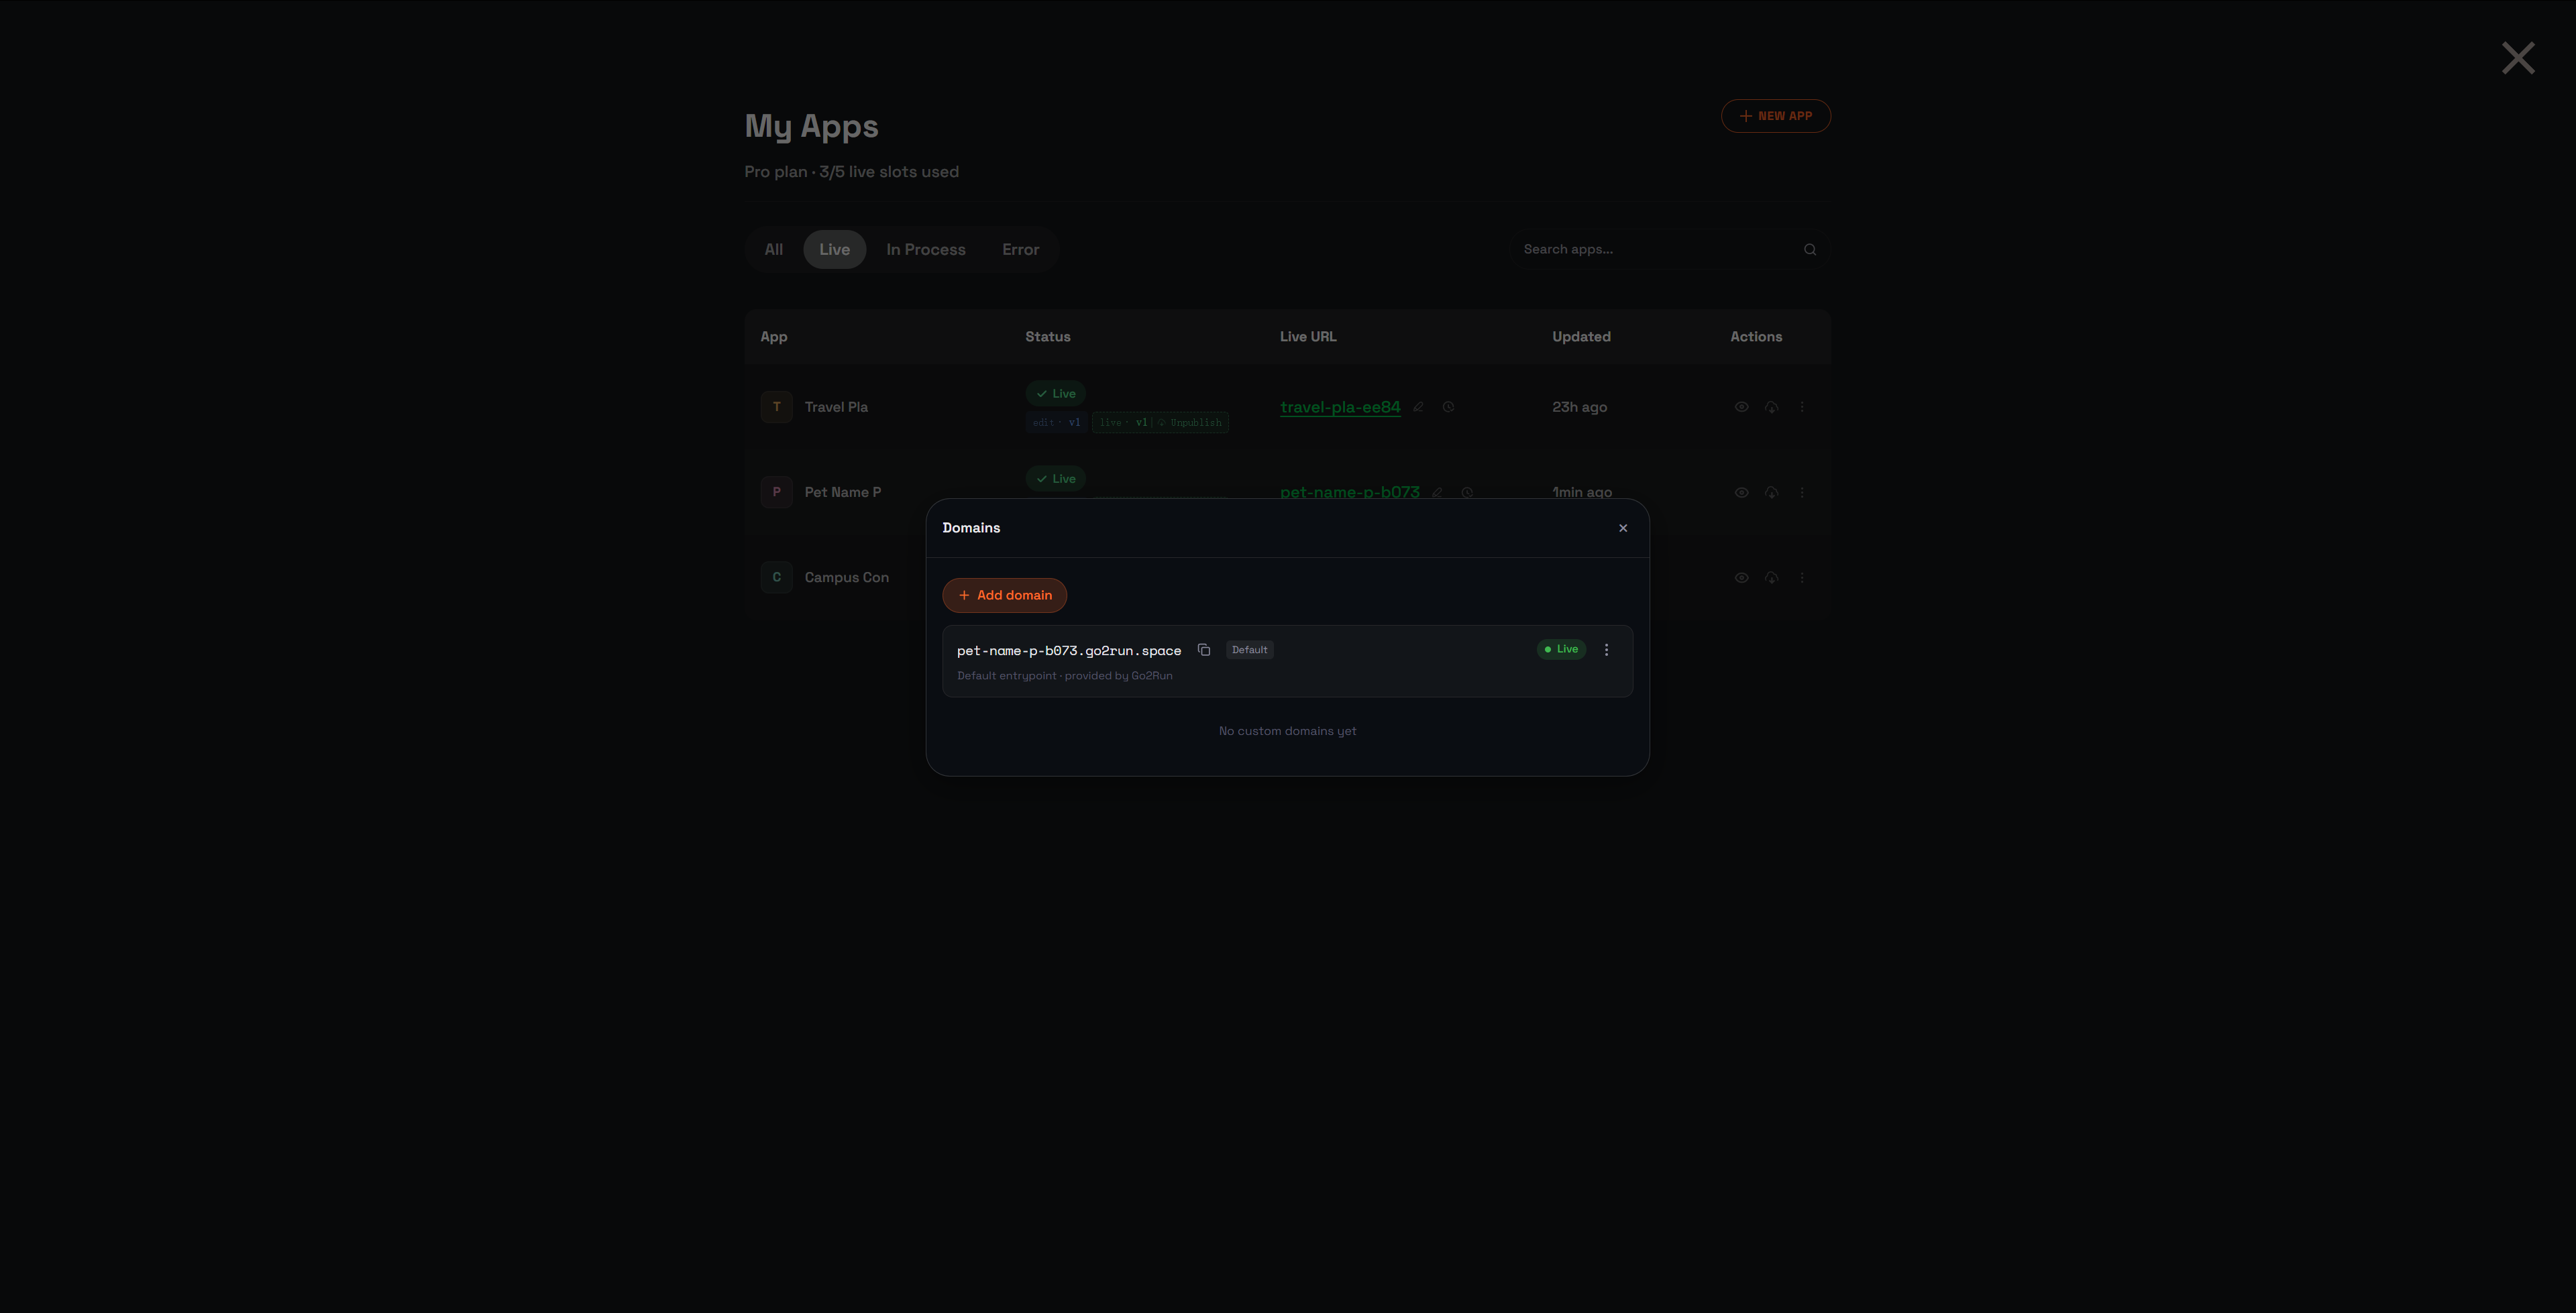
Rename your default subdomain
The default URL Go2Run gives you looks like pet-name-p-b073.go2run.space — works, but not great for sharing. You can add a friendlier subdomain on the same .go2run.space base:
Open the Domains dialog
From My Apps, click the pencil icon next to your app's Live URL.
Open the Default entry's menu
Click the ⋮ (kebab icon) at the right end of the row marked Default.
Click "Add new subdomain"
Type the new subdomain you want — just the part before .go2run.space — and save. It appears as a new entry in the domains list, working alongside the original.
Pick which domain users see
When an app has multiple domains — default, custom, or extra subdomains — one is the primary: the URL Go2Run treats as the public address. To switch:
Open the Domains dialog
Same as above — pencil icon next to your Live URL.
Open the target domain's menu
Click the ⋮ menu on any non-primary entry in the list.
Click "Set as primary"
That domain immediately becomes the user-facing URL. Other domains keep working as aliases — visitors landing on them are redirected to the new primary.
Mobile access
Published apps are responsive — desktop and mobile browsers open them directly, no extra setup.
Manage database
A built-in database for every app that needs one — no third-party tools, no separate setup.
Go2Run handles database provisioning so you can focus on what your app does, not on configuring servers. When your prompt implies data that needs to survive a refresh — users, tasks, posts, orders — Go2Run sets up a database during generation and wires the connection into your app code automatically.
How a database is provisioned
Just describe the app. Go2Run reads your prompt and decides what's needed:
- Mention accounts or sign in → a users table with the right columns
- Describe a trivia app → tables for questions and answers
- Describe a CRM → tables for contacts, deals, notes
You can also be explicit when you don't want to leave it to inference:
Add a users table with email, name, and signup date.
Either way, Go2Run designs the schema, creates the tables, and wires up the code that reads and writes them.
Don't need a database?
If your app keeps everything in the browser or doesn't need persistence, tell Go2Run to skip provisioning. Add a line to your prompt like:
Don't create a database for this — use browser local storage instead.
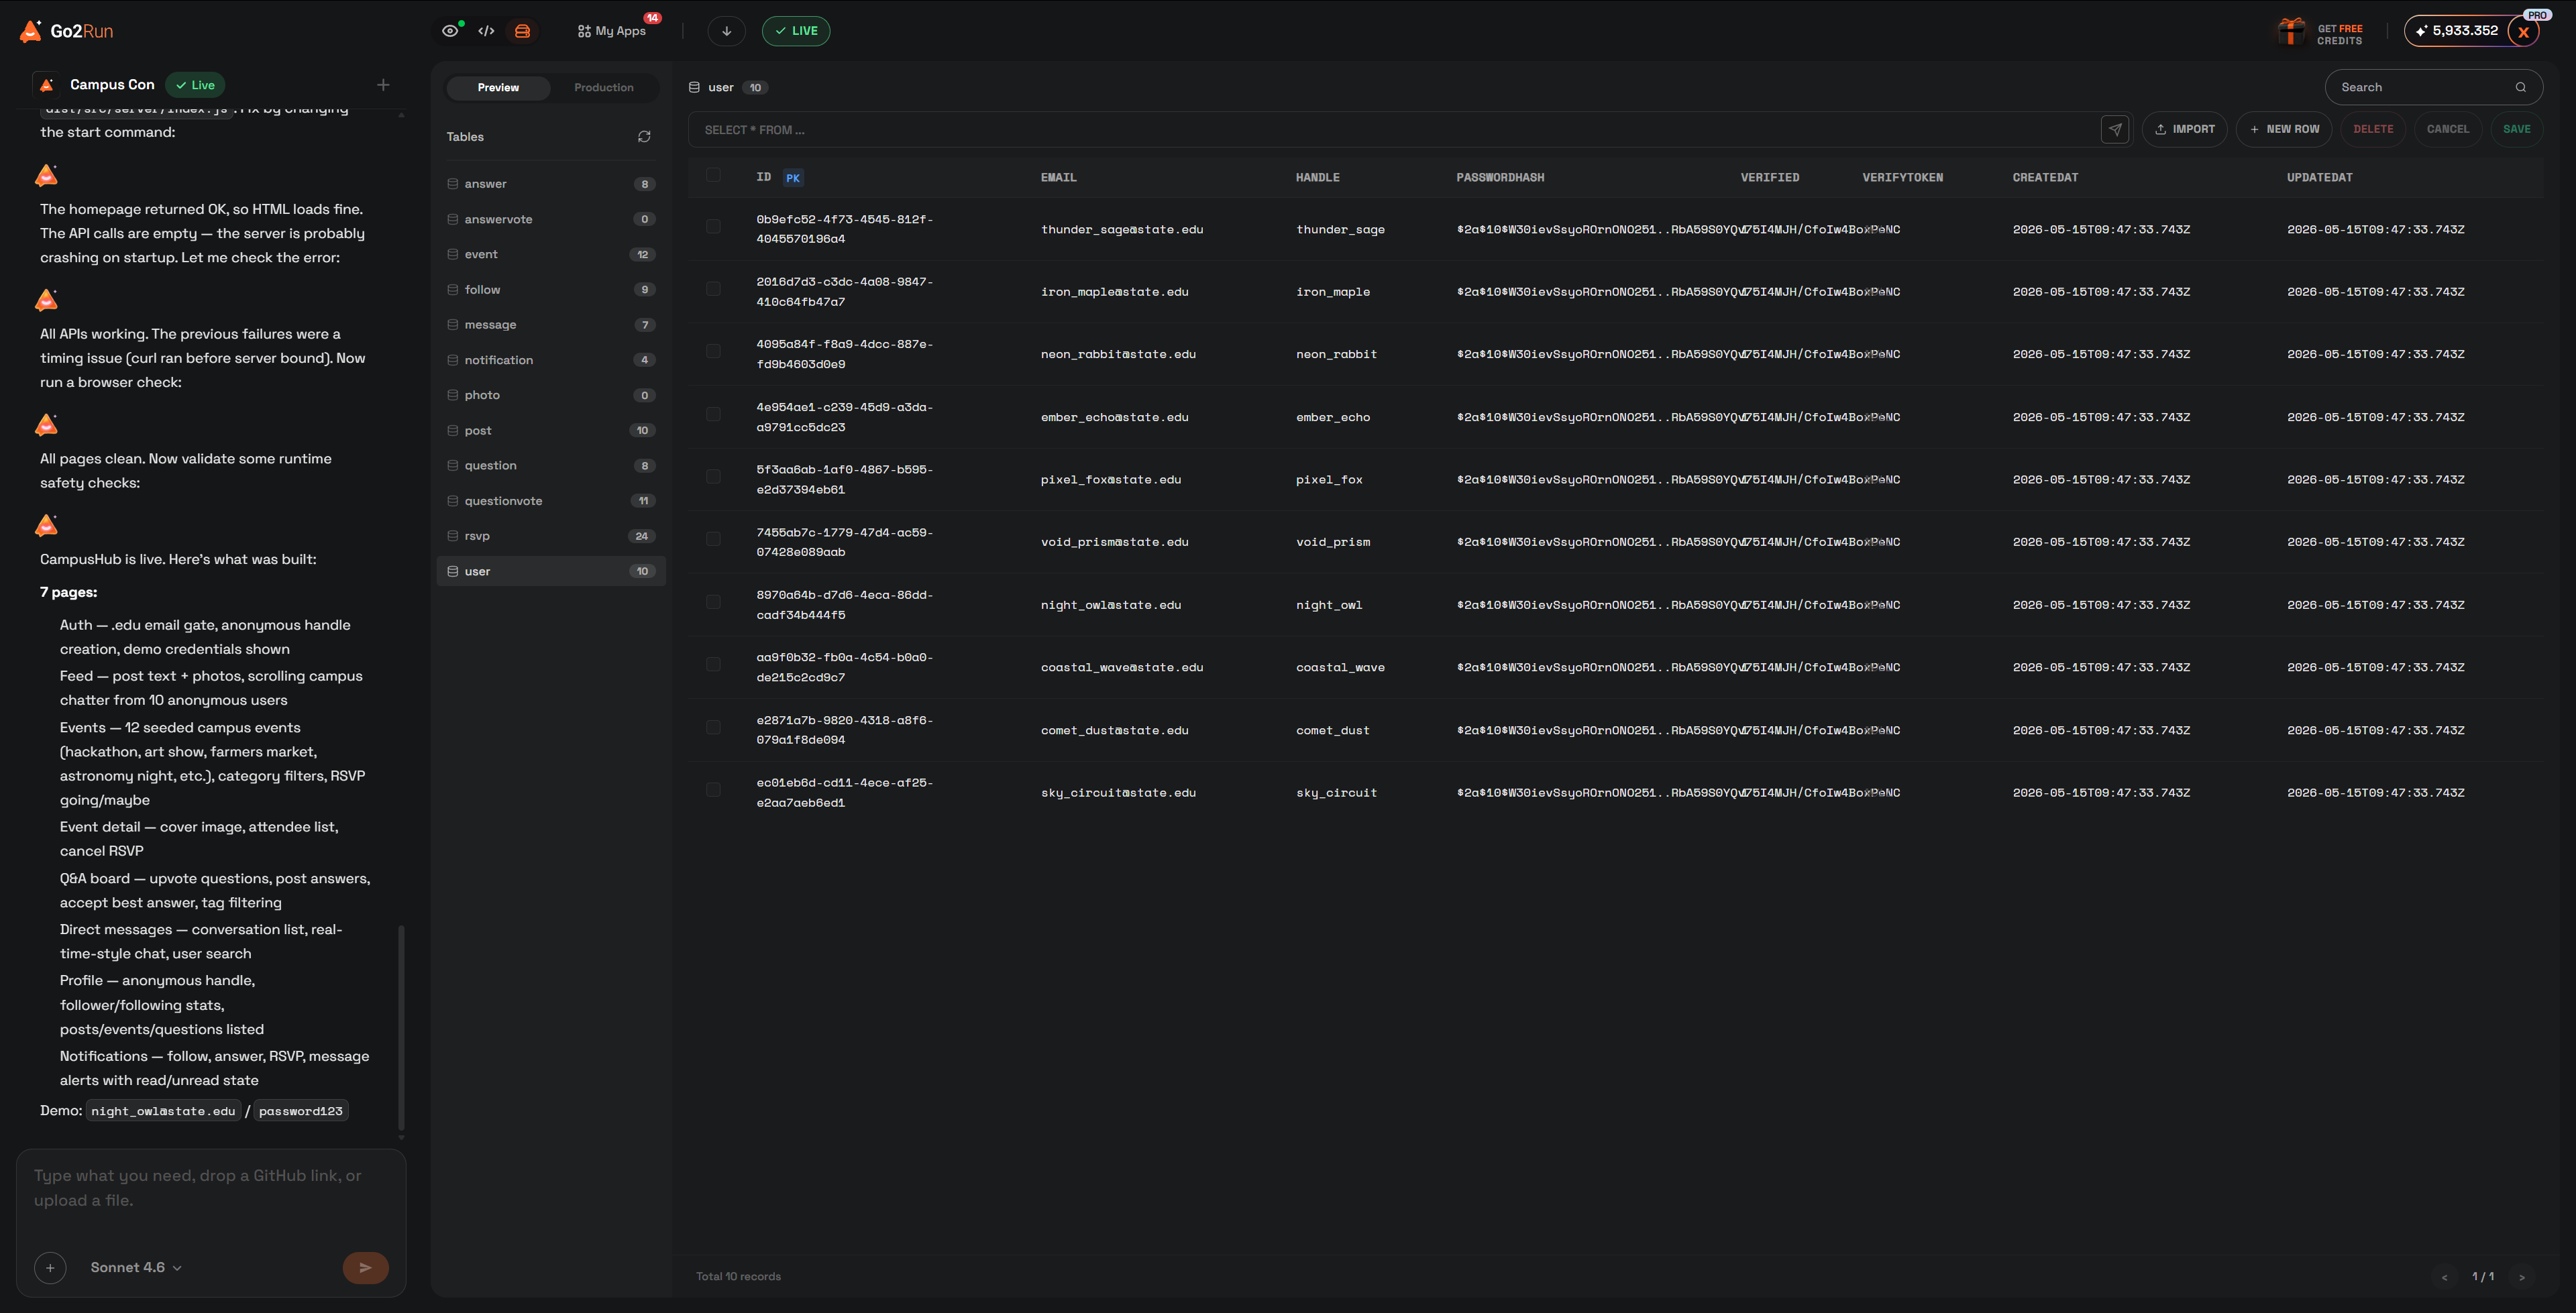
Edit your data
The database panel in the editor shows your tables alongside your chat. Inside the editor itself, two things you can do directly:
- ☑️Add a new row
- ☑️Delete an existing row
Everything else — adding columns, renaming fields, changing types, indexes, migrations — happens through chat with the AI. Just describe the change:
Add a "priority" column to the tasks table (low / medium / high), default medium.
Go2Run updates the schema, migrates existing rows, and patches the app code that reads or writes that column.